Wednesday, November 26, 2014

Generations Of Handcrafted Love: Doll Making

My great grandmother, Yetta Minetta, was beloved by our whole family. Her joy of sewing and hand crafting was obviously contagious, and as the story goes she loved to share her craft will all the women in the family.

If you've been following my blog, you know that I am crazy about art as well as crafting. My mother, a talented stitcher herself, taught me how to sew simple things such as pillows at a very young age. I have always wanted to further my skills in the craft, so when she recently received a new sewing machine as a gift and I immediately asked her to teach me how to use it.


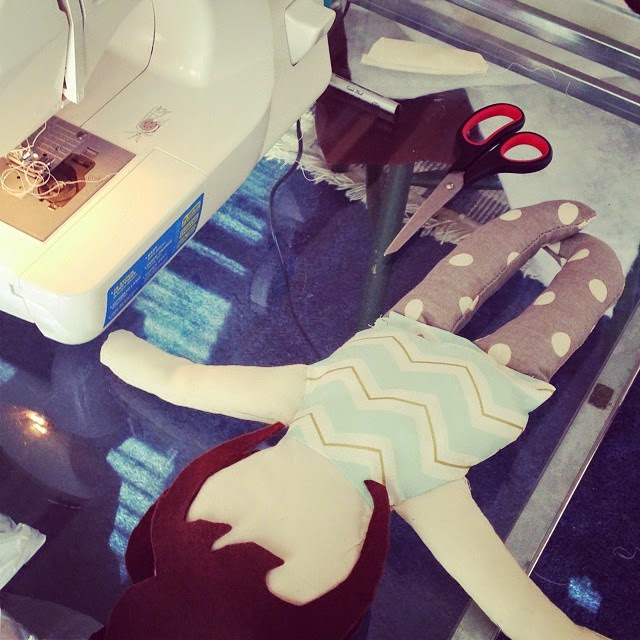
I am so thrilled that she's decided to pass along this generations-old craft to me. We have many projects ahead including a family quilt, but our first one was something that I have been dieing to try my hand at - doll making. My great grandmother as well as my grandmother and several other women in our family were and are doll makers. So I knew this one would be close to my heart.

I used a simple free template to start out with, altering it to fit the idea I had for the doll. With the help and advice of my mom, I was able to finish her in 2 days. I am very pleased with how she turned out! Of course I had to name her after my great grandmother, the master stitcher herself - Miss Yetta Minetta. 


After several requests from friends and family members, I have decided to open up a little Etsy shop in order to accommodate custom orders. Hence, The Selkie Stitches Studio was born out of a passion for sharing lovingly handcrafted items with loved ones and friends who can cherish them for generations in their own family. If you have a little girl (or boy!) who you need a gift for this holiday season, feel free to order one from my shop! I will have more items up very soon! :)

Are there any sewing crafts that you've been wanting to try lately?

For all you crafters out there - Stay tuned for a more in-depth post about how I made her!

Thursday, November 20, 2014

Welcoming Baby Benji Burch


About two weeks ago, on November 6 2014,  we welcomed little Benjamin Burch into our family. I have been present for the births of babes in my family as well as friends circle, but this incredible baby journey is one that I will never forget.

Benjamin is truly a miracle baby. Nikki, 38 and Gray, 40 weren't sure they would ever be able to conceive. Nikki's age was one factor, but also the fact that she suffers from severe endometriosis - little cysts that cover her lower abdomen on the inside of her body including her uterus and ovaries. The cysts had dissipated after surgery, but in a rare turn of events they had come back stronger than ever inside Nikki's body after she became pregnant. Because of this, she was in an unusual amount of pain and her doctor decided to induce the baby a little early.


On the evening of November 5, I arrived at the hospital with birth photographer Lola Scott of Lola's Lullaby Lens. (She recently launched the birth photography branch of her photography business, which you should really check out!) We were both extremely excited, and decided to stay overnight with Nikki along with my brother-in-law Gray and our cousin Holly. None of us ended up sleeping very much. The couches and floor were uncomfortable. But we didn't care. We were too excited to sleep.


Nikki was in a fair amount of pain the next day, but Gray did a great job helping her get through it. By around 6 p.m. she still hadn't dilated past 2 centimeters. The doctors decided they would have to do an emergency C section. Nikki and Gray were both so brave. It was very encouraging to me - as someone who has always counted C-sections among my greatest fears, to see the bravery in both of them as they entered the operation room. Nikki was shaking like a leaf because of the epidural, but the nerves were overshadowed by the joy she felt at the fact that she was about to meet the little guy she had carried inside her for nearly 9 months.


I cried when I heard Benji's first cry from inside the operation room! It may have been the most beautiful sound I've ever heard. I was just beside myself... 

About an hour later, baby Benjamin had arrived.

New life is incredible. If you've never seen or held a minutes-old baby - add it to your bucket list right now. It is definitely among the most amazing experiences one can have in life.

The emotion in the room after he was born was palpable. There have been very few times in my life that I've been in a room where sheer elation filled every tiny space. Witnessing these moments was worth every minute of sleep that was missed. 


Child birth has always been one of my biggest fears. All the things that could go wrong... all the pain we expect... all the careful planning involved which could mean the difference between a smooth delivery and a nightmarish one.

But that day, none of that mattered. There was only the sweet little face of the new person that had just made his debut in the world. 


Seeing a mother's love in it's purest form that day changed me. I can't ever forget that moment. I hope that everyone can experience a love that strong and unconditional from another human being in their lifetime. It reminded me that love is the only thing that truly matters, in the end.

Thank you to my amazingly sweet friend Lola for capturing these moments and making it possible for us to look back on them forever and ever. Please consider contacting her if you live in Georgia and are in need of a birth photographer that can capture all the nuances of your birthing experience!

Disclaimer: All photos are copyright protected as property of Lola Scott Art. Please do not use without permission.

Wednesday, November 19, 2014

Caramanilla Pie: You'll Crave This "Rawsome" Raw/Vegan Dessert!

This recipe was inspired by Emily Von Euw's "Raw Vanilla Coffee Cream Pie With Chocolate Crust". Emily Von Euw is creator of the endlessly delicious raw/vegan blog This Rawsome Vegan Life

Her blog as well as cookbook Rawsome Vegan Baking are filled with amazingly tasty desserts like this one that will make sure your mouth will water from now on every time you hear "raw vegan desserts". Below is an image from her blog of the incredible recipe!

Emily Blackwell (yes, another Emily!) is a good friend of mine who has been a raw/vegan cooking enthusiast for quite some time. She has developed quite an arsenal of raw/vegan dessert recipes while experimenting in her kitchen - each one so good you would never know it was healthy. 
She isn't a full-time vegan, but loves to incorporate vegan practices into her scrumptious treats for the added health benefits that come with minimizing dairy and maximizing raw nutrition content.

"Caramanilla Pie" is her take on the above mentioned delicious pie by Emily Van Euw!


Emily Von Euw's Raw Vanilla Coffee Cream Pie With Chocolate Crust


Emily Blackwell's Caramanilla Pie Recipe

Crust:
1 cup pecans
1 cup dates
2 tbsp cacao powder
1/4 tsp cinnamon
1/8 tsp salt
2 tbsp coconut oil

Blend until sticky and press in the bottom of the pan

Filling:
1 1/2 cup macadamia nuts
1/2 cup pine nuts
1/4 tsp vanilla powder
3 tbsp coconut oil melted
1/4 cup maple syrup
1/3 cup brewed coffee
1/8 tsp salt

Blend until smooth and pour over crust

Topping:
1/2 cup dates
1/2 tsp salt

Cover dates with coffee. Blend until smooth.

Garnish with strawberries and pumpkin seeds.


Making the filling: behind the scenes!


Melted Coconut Oil


French press is the best! The stronger the potency of the coffee you brew, the more the taste will stand out in your recipe.


Making the topping!


Will you be my date? Make sure your dates are pitted before you blend.


Add just a pinch of salt!


Blend until very creamy!


Making the crust!


Knead the dough thoroughly and evenly.


Filling it in!


Fill from edge to edge, and spread evenly.


Cicero approves! :3


Refrigerate, then add cream topping and garnish! Enjoy! :)

Emily Euw's Raw Vanilla Coffee Cream Pie With Chocolate Crust

Monday, November 17, 2014

A Weakness for Watercolor: My Painting Journey Plus Tips

Ever since I was little, I remember watercolor being my favorite painting medium. There was always something magical about combining water with pigment to get beautiful color that could be manipulated a thousand different ways. So naturally when I recently decided to pick up painting again, and I immediately went for the watercolors.

I get so much happiness out of using this medium! I love the versatility of the colors and textures, the fluidity and depth. Many in the art world proclaim it as the most difficult medium, because of it's relative difficulty to control compared to it's thicker, non-water based counterparts. But there is just nothing that can compare to watercolor for me. 

My portrait of Natalie Portman

I started out with a basic pallette set from Hobby Lobby that cost only $4.99 (note: not the pearlescent version shown). Although the paints aren't the highest quality and aren't guaranteed to stand the test of time like many other sets, I still highly recommend this set for any beginner. The paint works well and the set includes all the essential colors.

This bird's nest was one of my first pieces. I learned the technique by watching this tutorial video by thefrugalcrafter Lindsay Weirich who is absolutely fabulous. It's actually very simple!


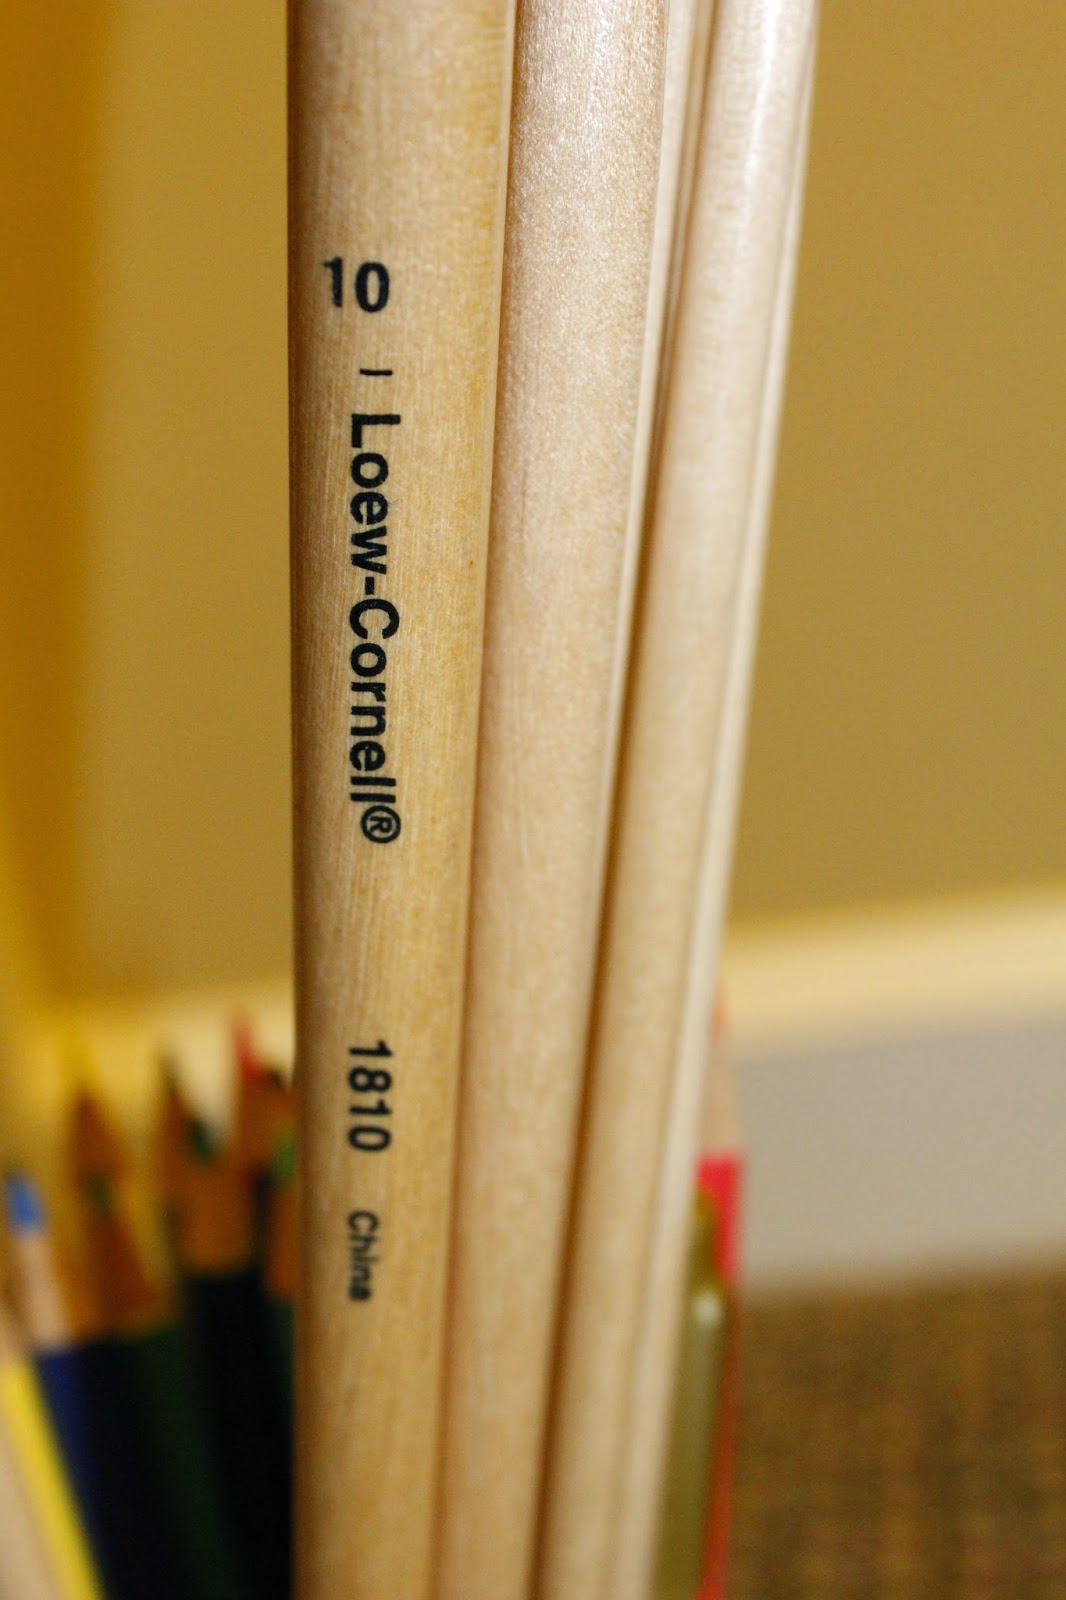
I used some Leow-Cornell brushes that I originally bought to use with oil paint. Although it may be better to use brushes that are specifically made for water-color, I found that these worked just fine for me. The set was also at Hobby Lobby, and the brushes come in all different sizes.


After playing around with these for a little while, I decided to up my game a little bit. I bought some better quality paints that come in small tubes. They're "Authentic Chinese Watercolors" made by Yasutomo - $7.99 at Hobby Lobby. The colors are richer and much more vivid out of the tube. The paint comes out thickly, and you mix it with water to control it's color density.


My favorite colors in this set are 55, 58 and 55; vivid cyan, deep burgundy and beautiful indigo shades.


I quickly discovered the endless possibilities of stencils and watercolor. The above portrait of Natalie Portman was inspired by this awesome tutorial on how to create a stencil portrait using photoshop by Mr. Otter Art Studio. This girl has made a ton of super helpful tutorial videos where she really breaks it down for us step-by-step, and shows us some super easy ways of achieving professional looking styles.

Paper is extremely important in working with this medium. Cold press, a thick paper that can handle a lot of water application, is one of the only viable options for this medium. 140 lb. or higher is what I use. I quickly found out that using anything less heavy than this can be a real pain if you use water as much as I do. I purchased this Strathmore paper at Hobby Lobby for $9.99. This brand comes in a wide array of sizes, from post-card sized to almost poster sized.


Watercolor pencils are a must. These things are awesome. They allow you to first draw and color in pencil - adding color-blending and shading, then apply water over with a brush the penciling and it becomes paint. I purchased a set of pencils by Kimberly/General's at Michaels for about $14. There were cheaper sets, but after trying some of them, I noticed that they didn't quite blend as well as these.


I had a blast making this one. I made a simple stencil of the state of Georgia, then went crazy with the color bleeding, splattering etc. I was inspired by some of my favorite Etsy artists including WatercolorBook and Paulrommer.


I am really proud of this one! This was my first time trying the drip effect, and I am very pleased with the outcome. I was inspired by the incredible artist Marion Bolognesi. It's very much my own style, but her amazing drip effect portraits blow my mind and I had to try something similar. I kind of can't believe I painted this. It just goes to show you, just because you're a beginner doesn't mean you can't do great things with a little practice! I am looking for the best outlet to make some prints of this one.

The act of painting is extremely relaxing and therapeutic for me. It also is an incredible creativity booster in general. I recommend it to everyone, regardless of the confidence they have in their artistic abilities.

I am looking forward to continuing my painting journey and I definitely feel like I get better with each painting! Watercolor is one of the most inexpensive painting mediums there is, so giving it a try won't be too big of a risk. And the rewards are endless! :)